Stop Amazon KDP Rejections with the Right Margins
There is a specific sinking feeling that hits every self-publisher when the "Update Needed" email arrives from Amazon KDP. You have spent weeks perfecting the cover, agonizing over the content, and formatting the text, only to be told the book has been rejected due to interior margin violations. This is the most common hurdle for new publishers, but it is entirely avoidable with the right preparation. Using precise KDP Interior Margin Templates is not just about following rules; it is about ensuring your book looks professional and reads comfortably, preventing the technical errors that halt your publishing momentum.
Understanding the Technical Anatomy of Your Book
When you open a physical book, you probably don't think about the "gutter"—the valley where the pages meet at the spine. However, this is where the majority of rejection issues occur. If your interior margin is too narrow, the text disappears into the binding, making the book impossible to read. If your outer margins are too small, the reader’s thumbs cover the words while holding the book. KDP Interior Margin Templates solve this by providing a visual guide that accounts for the specific paper weight and binding style used by Amazon’s print-on-demand service.
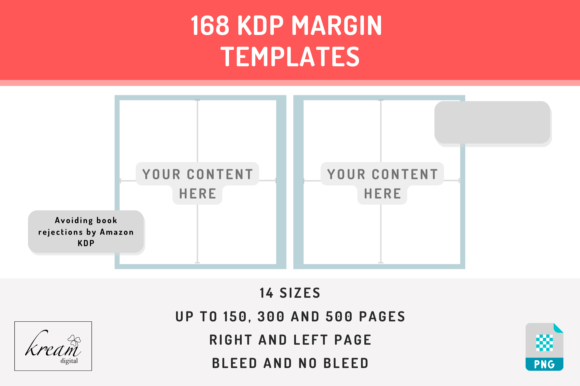
The visual characteristics of these templates are designed for pure utility. Typically rendered as PNG files with transparent backgrounds, they feature a "safe zone" indicated by a light blue border. This visual style is intentionally minimalistic to ensure it doesn't clash with your existing design elements. Whether you are working on a novel, a coloring book, or a business workbook, the template acts as a visual ruler. It separates the "live area" (where your text and images must stay) from the "bleed area" (the zone that gets trimmed off after printing).
Matching Trim Sizes to Content
One of the biggest practical challenges is selecting the correct trim size. KDP supports a wide variety of dimensions, and your choice influences the reader's perception of your book. For example, the 5"x8" and 5.25"x8" sizes are industry standards for fiction and memoirs. They feel intimate and are easy to hold in one hand. Conversely, larger formats like 8.5"x11" or 8.27"x11.69" (A4) are necessary for workbooks, technical manuals, or art books where detailed visuals are the priority.
Using a template ensures that your design assets scale correctly. Imagine designing a cookbook on an 8"x10" canvas. Without a margin guide, you might place a recipe too close to the edge, only to have it chopped off during the manufacturing process. The templates provided cover up to 500 pages, which is critical because the margin requirements change as the book gets thicker. A 500-page book requires a much wider gutter than a 100-page book to remain readable. By selecting the template that matches your specific page count (up to 150, 300, or 500 pages), you ensure the spine accommodates the paper bulk.
Bleed vs. No Bleed: A Crucial Distinction
A common point of confusion is the difference between bleed and no bleed interiors. If your book consists solely of text on a white background, you generally do not need bleed. Your content stays within the safe blue zone, and the white paper extends to the edge naturally.
However, if you are creating a children’s book, a photo book, or a journal with background colors or images that touch the edge of the page, you must use bleed templates. In this scenario, the template shows you exactly how far past the trim line your image must extend (usually 0.125 inches) to avoid having a thin white sliver on the edge of the finished page. This distinction is vital for graphic designers and content creators who want a polished, professional look. The KDP Interior Margin Templates provide distinct PNGs for both scenarios, removing the guesswork from print design.
A Step-by-Step Workflow for Flawless Interiors
Implementing these templates into your workflow is straightforward, but it requires attention to detail. Whether you are using Adobe InDesign, Canva, or Affinity Publisher, the process is the same.
- Select the Correct Template: Choose the PNG file that matches your specific trim size (e.g., 6"x9"), your page count, and your bleed requirements.
- Layering for Precision: Import the template as the top layer in your design software. Because the PNG has a transparent background, you will see your content underneath the light blue guide lines.
- Handling Left and Right Pages: Books have an asymmetry to them. The "gutter" (the space near the spine) is larger than the outer margin. You must place the Left Page Template on even-numbered pages and the Right Page Template on odd-numbered pages. This ensures the extra space is always on the spine side.
- Content Placement: Ensure all essential text and imagery stays inside the light blue border. If you are using bleed, allow your background images to extend all the way to the edge of the canvas, ignoring the blue line for those specific elements.
- Final Cleanup: This is a step many forget. Before exporting, delete the template layer. If you leave it in, you will print a book with blue lines all over the pages.
Ensuring Quality and Avoiding Rejection
Once your design is complete, the final stage is file preparation. Save your document as a Print-Ready PDF. This format preserves your fonts and layout. However, a PDF alone doesn't guarantee acceptance. You must check the resolution of your images. For print publishing, images should generally be 300 DPI (dots per inch). Blurry or pixelated images are a common reason for rejection or poor customer reviews.
Finally, use the KDP Previewer. This tool simulates exactly how your book will look in print. It will show you if any text is too close to the edge or if images are missing. By using the KDP Interior Margin Templates throughout your design process, you will find that the previewer confirms what you already know: your book is perfectly formatted, professional, and ready for the shelves. This proactive approach to editorial design saves time, reduces frustration, and ensures your brand identity as a publisher remains strong and credible.